Difference between revisions of "Creating a new format style"
| (One intermediate revision by the same user not shown) | |||
| Line 18: | Line 18: | ||
| − | Then, click | + | Then, click Ok to proceed. |
[[File:Format create-new-format top3-ok.jpg|thumb|center|x250px]] | [[File:Format create-new-format top3-ok.jpg|thumb|center|x250px]] | ||
| Line 33: | Line 33: | ||
[[File:Format create-new-format apply.jpg|thumb|center|x250px]] | [[File:Format create-new-format apply.jpg|thumb|center|x250px]] | ||
| − | [[File:Format creating-a-new-format-style new-available-format-styles.jpg|thumb|right| | + | [[File:Format creating-a-new-format-style new-available-format-styles.jpg|thumb|right|x250px]] |
Clicking the '''Apply''' button will add the newly created format to the '''Available Format Styles''' drop-down box. | Clicking the '''Apply''' button will add the newly created format to the '''Available Format Styles''' drop-down box. | ||
Latest revision as of 14:31, 7 August 2013
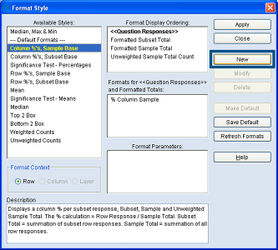
To create a new format that doesn't exist in the Available Format Styles list, first insert at least one question into Rows or Columns. Next, click on the Format Styles icon, located to the right of the Available Format Styles drop-down box.
Then, click the New button to start building a new format.
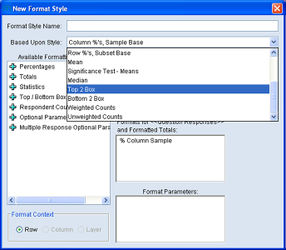
Next, choose an existing format style that can be used as a starting point for the new format. For this example, we will use the existing Top 2 Box format will be used to create a new Top 3 Box format.
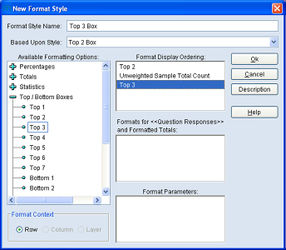
Give the new format a name. Then, expand the light-blue plus signs [+] to find any new format options you require. Click and drag or double-click each new format option to insert it in the Format Display Ordering section.
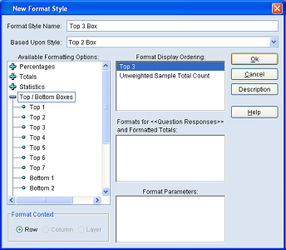
Next, in the Format Display Ordering section, drag out any existing format options that you do not require for the new format. Then, rearrange the remaining items based on preference. If a format option should appear before the Sample Total Counts in the mTAB spreadsheet, then it should be listed ahead of the Sample Total Count in Format Display Ordering area.
Then, click Ok to proceed.
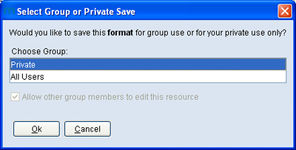
The next window may or may not appear, depending on an individual user's settings. If an mTAB user has the ability to share resources with other users within their group, the following window and message will appear. Choose Private to save this newly created format for personal use. Choose All Users to make this format available to everyone. Choose something other than Private or All Users to make the newly created format accessible to all members of a certain user group. For example, the user may have a group titled Evaluation. If the Evaluation user group was selected, the newly created format would be shared with other mTAB users who are a part of the Evaluation group.
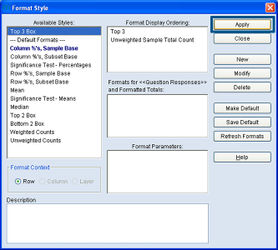
The newly created Format Style should now appear in the Available Styles list. Note, the --Default Formats-- divider. All pre-loaded, Default Format Styles will appear below this divider. All user-created formats will appear above the divider.
Now, click the Apply button.
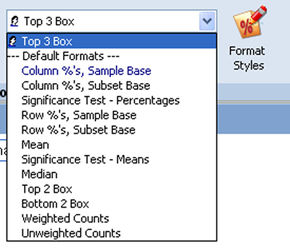
Clicking the Apply button will add the newly created format to the Available Format Styles drop-down box.
Highlight either the Row or Column questions to format, then click the drop-down arrow for the Available Format Styles and select the newly created format.
Click the Run Tab icon and the new format style will be displayed in the spreadsheet results.

